
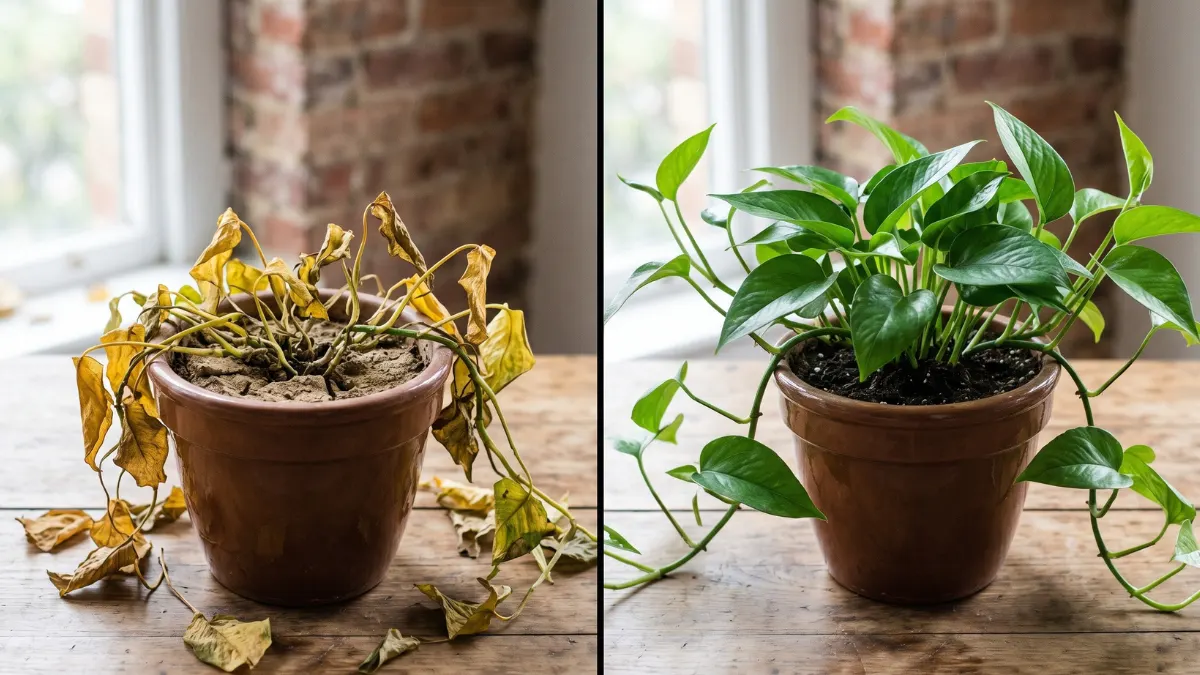
Every year, millions of houseplants die not from incurable disease or irreversible neglect – but from misdiagnosis and reactive overcorrection. If you are a plant lover, your heart also feels heavy when a plant dies, along with your ego. The most common causes of plant death are overwatering, Underwatering, lack of sunlight, and, last but not least, pests and bugs.
You can get to the core reason for the issue and save your plant from drying up and eventually dying. We are here to help you to guide you in the right direction so that you can save your plants and get them back to their former glory.
What Actually Causes a Plant to Start Dying
If your plant to be die and if you want to revive to the plant so Once you know what is happening, reviving the plant gets much easier. In most cases, the reason of dying plant is underwatering, overwatering, poor lighting, or pests.
Step 1: Check Whether the Plant Is Still Alive
If your plant is dying, most people tense up and throw it away way before it actually dies. Before you do that, try this old gardener’s trick: take your nail and gently scratch a tiny bit of the stem. If you are able to see your plant is green from under the surface, don’t worry; your plant is still alive. But if it’s dry and brown all the way through, that part is gone for good.
Step 2: Check the Roots
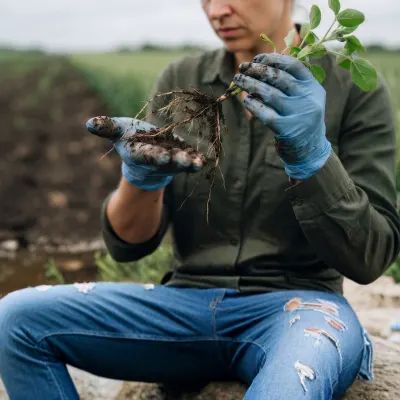
Whether your plant makes it or not is really being decided underground, not up to where you keep checking the leaves. If you don’t know if your roots are alive or not and want to know how to check if plant roots are alive, what you have to do is take your plant carefully out of the pot and look at the root ball. Check the roots once; if the roots feel firm and look white, your plant is still alive. And for those people who ask, “Is my plant dead if the roots are still white?” Not even close — that’s honestly one of the best signs you could hope for.
Precautions: Be gentle while doing this; never force or yank the plant out of the pot, and try not to do it under harsh sunlight, since that can add extra stress to roots that are already struggling.
Step 3: Identify the Warning Signs
Most of the signs of a dying plant are leaves going yellow or brown, soil that’s either constantly soggy or completely bone dry, leaves dropping one after another, stems turning soft and mushy, and growth that has just… stopped.
Precautions: Don’t panic over one yellow leaf — that’s usually just normal ageing, not a red flag. Look at the plant as a whole and see if there’s an actual pattern before you decide it’s actually dying.
Step 4: Check for Overwatering
People who are beginners in gardening make mistakes during watering. They always water too much because they’re scared of underfeeding their plant, but this actually chokes the roots by cutting off oxygen. Yellowing leaves, a slightly rotten smell from the soil, and leaves dropping off as the roots quietly decay are the symptoms of an overwatered plant. Push a finger an inch or two into the soil – if it feels wet and heavy, that confirms overwatering.
Precautions: Avoid testing with a finger right after watering, since the soil will naturally feel damp; wait at least a day for an accurate read.
Step 5: Fix Overwatering
We all know that plants require water to live. But we all know too much water can also be harmful to the plant. Overwatering causes damp soil, which eventually leads to decaying roots. If you are overwatering your plant, then your plant will appear to be yellowish. If you find yourself in this scenario, then save the plant in this condition.
This is one of the most common reasons behind a dying money plant too – Money plants are hardy, but their roots rot fast in soggy soil, so if you’re trying to figure out how to revive a dying money plant, cutting back on watering is almost always the first fix.
Precautions: Keep the plant away from sunlight for some days till the soil dries out.
Step 6: Replace Damaged Soil
Healthy soil is essential if you want good growth of the plant. If your plant is struggling to grow. So what you have to do in this situation is gently remove the plant from its pot. Don’t use old soil, and change the soil. Add some compost plus some nutrients and prepare a potting mix using these ingredients. This will ensure that your plant has the resources it needs to recover.
When you are choosing new soil, opt for a mix that suits your plant’s needs. Cactus and succulents need well-draining soil, and if we talk about the soil for tropical plants so they prefer nutrient rich soil. Give your plant organic plant food fertilizer mixed into the fresh soil to provide the roots with a gentle nutrient boost right from the start.
Step 7: Remove Dead Growth
First, cut all your plant’s dead parts to save the plant. If the stem of the plant is dead, but the roots are still healthy, then cut the stem and leave 5 cm of stem above the ground.
This step is useful if your snake plant is dying and you want to know how to revive a dying snake plant, since snake plants often keep healthy roots even when their upper leaves have collapsed, and trimming the dead leaves.
Step 8: Improve Humidity
Plants from tropical regions require more humidity than you may realize. If your plant is dying due to a lack of humidity, the main signs of a dying plant are wilting and turning brown. Then you can handle the situation by moving your plant from sunlight to a more humid place.
A peace lily is a good example here of the importance of humidity. If your peace lily is dying and you don’t know how to revive a dying peace lily, low humidity combined with dry soil is the culprit; as you all know, peace lilies droop dramatically the moment they’re thirsty or the air around them gets too dry.
Step 9: Fix Sunlight
The role of good sunlight is as important as sugar in tea. So giving your plant good sunlight is the key to a happy plant. The main role of light is to control how your plant photosynthesizes. If your plant does not get enough sunlight, its leaves will turn yellow, and after some time, your plant will die, and it’s the biggest heartbreak for every plant lover.
Precautions: When moving a plant to a brighter spot, do it gradually over a week or two — a sudden jump to strong sunlight can burn leaves that aren’t used to it.
Step 10: Check for Pests
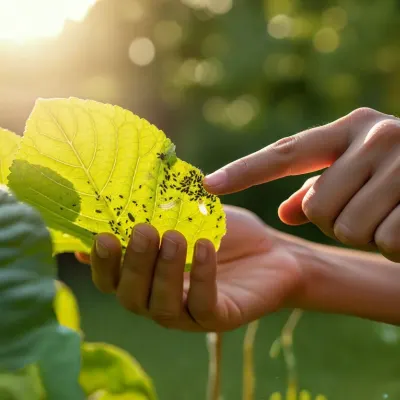
If you think pests are the problem, flip the leaves over and take a good look at the undersides – tiny bugs, sticky residue, or a white powdery film are the usual giveaways. It’s basically impossible to keep a home totally bug-free, so the moment you spot an infested plant, move it away from your other plants before things spread. A mild neem oil or soap-water spray, sprayed on once a week, usually does the trick.
Step 11: Look for Nutrient Problems
Signs of nutrient deficiency in plants include pale or yellowing older leaves, growth that’s slowed to a crawl, and odd spotting across the foliage. Too much fertilizer causes its own set of problems.
Step 12: Fertilize Carefully
Leaves turning yellow? Not enough flowers blooming? If you are facing these problems in your plants So, Plant Food Organic Fertilizer for plants could be the perfect solution for you. Fertilizers aren’t always the solution to yellow leaves. Overwatering, poor light, pests, and root damage are also the main reasons for yellow leaves.
Plant Food Organic Fertilizer is one of the best fertilizers for the healthy growth of the plant. This organic liquid fertilizer allows roots to absorb it fast.
Step 13: How to Revive a Plant with Yellow Leaves
For how to revive a plant with yellow leaves, first figure out whether overwatering, underwatering, or a nutrient gap is behind it, then adjust your care accordingly. Leaves that have already gone yellow won’t turn green again, so trim them off and let the plant put its energy into fresh growth instead.
Step 14: Choose the Right Water
Water containing fluorides and chlorine can severely damage the plant, so if you are trying to revive dying plants, try watering them with filtered water.
Step 15: Repotting for a fresh start
Repotting on time is also the main cause of the plant dying, so if you are facing this situation, so repot your plant on time is the best decision. Make sure your pot is big enough for your plant, because roots need more space to spread. If the roots of the plants are stuck to each other and they are unable to spread in the pot, proper nutrients cannot reach the roots, so your plant dies due to a lack of nutrients. So, perform repotting occasionally and always use sturdy pots with a sound drainage system.
Revive your plants again with Upjau‘s Fertilizers:
If you’re looking for an easy way to bring your plant back to life, Plant Food Organic Fertilizer is one of the best fertilizers in your gardening kit. This liquid fertilizer is made from natural, organic ingredients; it gives nutrients to the soil and roots without exposing your plant to harmful chemicals, making it safe for soil, plants, and pets alike.
Frequently Asked Questions:
- Can a completely brown plant come back to life?
Yes, a completely brown plant can sometimes recover if its roots or stems are still alive. Check for green tissue by gently scratching a stem.
- Can a plant with no leaves still be alive?
Yes, a plant with no leaves can still be alive. Check the stems and roots for signs of life. If the stem is firm and green underneath, there is hope. Remove dead parts and provide suitable light, water, and humidity while waiting for new growth.
- How to revive an indoor plant in the monsoon?
During the monsoon, avoid overwatering because damp soil can cause root problems. Place the plant somewhere with good airflow and bright, indirect light. Check the soil before watering and make sure the pot has drainage holes so excess water can escape.
- How do I revive a plant after a long trip?
First, check the soil and leaves to understand how badly the plant has suffered. If the soil is very dry, water it slowly and thoroughly. Remove completely dead leaves, and keep it in suitable light.
- How to revive a wilted indoor plant?
Start by checking the soil. If it feels dry, water the plant thoroughly and let the extra water drain away. If the soil is already wet, wait before watering again. Keep the plant in bright, indirect light and remove badly damaged leaves.
